
Introduction
After weeks of flaunting your gorgeous fall nails, it’s time to remove that beautiful nail art and start fresh. However, removing nail designs—especially those with glitter, gel polish, or intricate details—can often be tricky, and if not done correctly, it can leave your nails feeling weak, damaged, or dry. Whether you’re switching up your fall manicure or just need a quick change, it’s important to know the best methods for removing your nail designs without causing harm to your nails. In this article, we’ll share the most effective and safe ways to remove fall nail designs while keeping your nails healthy and intact.
Why Nail Removal Can Be Harmful
While nail art is fun and creative, the removal process can sometimes lead to damage if not done correctly. Common mistakes include:
1. Scraping or Peeling Off Polish
Scraping or peeling off nail polish, especially glitter or gel, can cause the top layers of your nails to peel, leaving them thin and damaged. This is particularly harmful if you have intricate nail art designs that involve layers of polish or glitter.
2. Overuse of Acetone
While acetone is an effective remover for stubborn nail polish, using it too often can dry out your nails and cuticles, leading to brittleness and peeling.
3. Rubbing Nails Aggressively
Rubbing your nails too hard during the removal process can weaken the nail bed and cause pain or discomfort. It’s important to be gentle when removing nail art to avoid unnecessary stress on your nails.
How to Remove Fall Nail Designs Safely
Removing your fall nail designs doesn’t have to be difficult or damaging. With the right technique and tools, you can gently remove your nail art while preserving the health of your nails. Here’s a step-by-step guide to safely removing your fall nail designs:
1. Use a Gentle Nail Polish Remover
Choosing the right nail polish remover is essential for maintaining healthy nails. Opt for a remover that is acetone-free or contains moisturizing ingredients like vitamin E, aloe, or jojoba oil. These removers are less drying and will help keep your nails hydrated during the removal process.
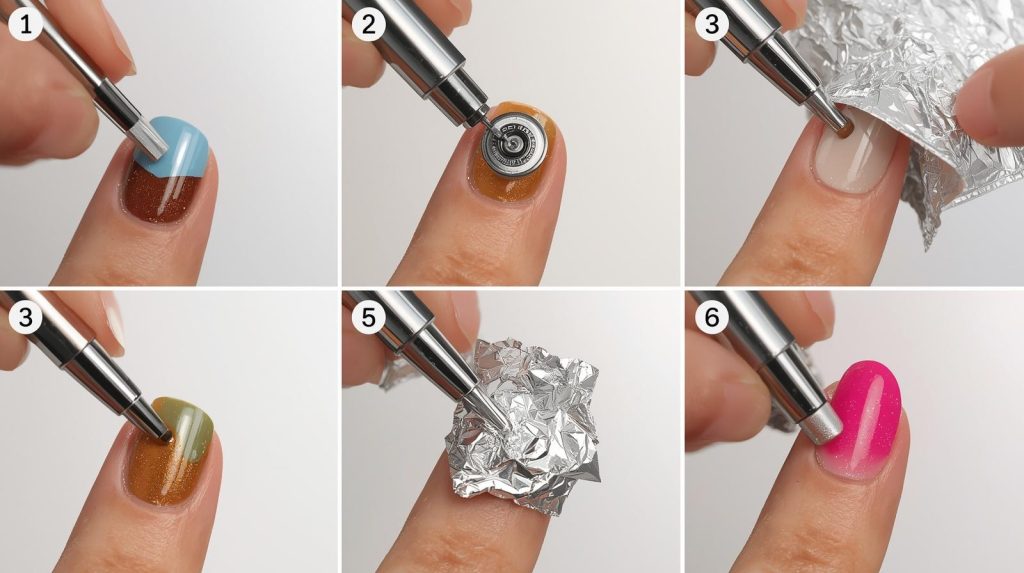
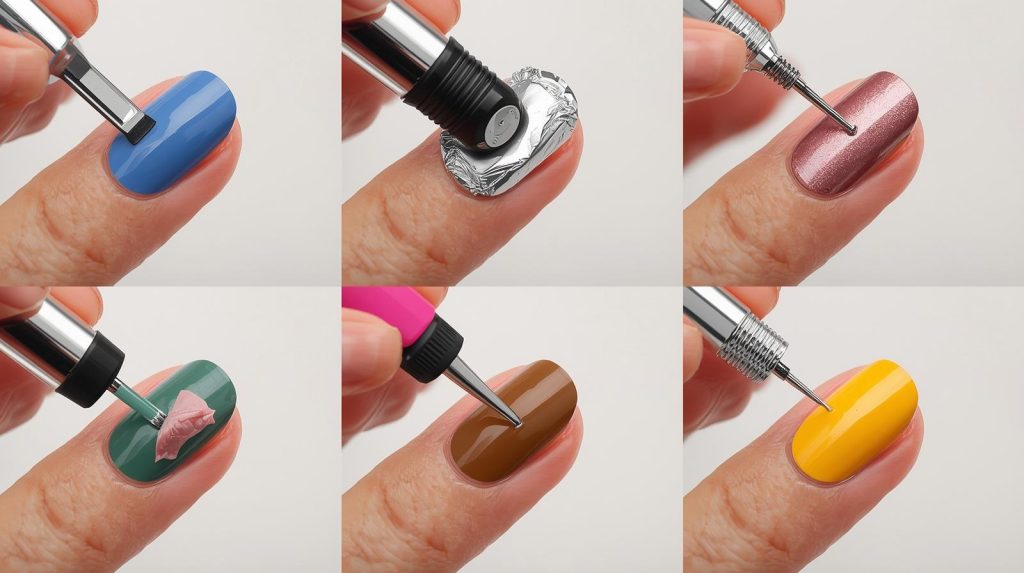
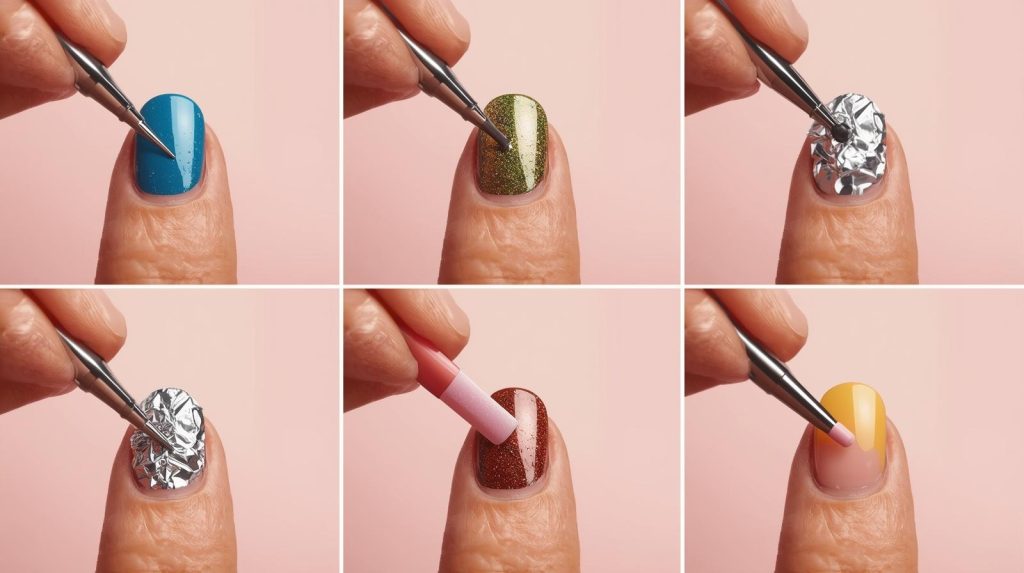
- How to Do It: Soak a cotton pad with your remover, place it on your nail, and wrap it with aluminum foil to keep it in place. Let it sit for 10-15 minutes, and the polish should start to loosen. Gently wipe off the design without scrubbing or peeling.
2. Soak Nails in Warm Water
For a gentler approach, soaking your nails in warm water can help loosen nail polish, especially if you’re trying to remove a more intricate design, like glitter or textured nails. This method is safe and hydrating for your nails.
- How to Do It: Fill a bowl with warm water and add a few drops of dish soap or a gentle cuticle oil. Soak your nails for about 10-15 minutes to soften the polish. After soaking, gently rub the polish off using a cotton ball or soft cloth.
3. Try a Gel Polish Removal Kit
If you have gel nails or hard-to-remove designs, a gel polish removal kit can make the process much easier. These kits are specifically designed to break down gel polish without damaging your natural nails.
- How to Do It: Follow the instructions in the gel removal kit, which usually involves wrapping your nails with pre-soaked cotton pads or using a gel polish remover solution. Allow the product to sit on your nails for the recommended time, then gently scrape off the polish with a wooden stick or cuticle pusher. Be sure to moisturize afterward.
4. Buff Away Excess Nail Art
If your nail art involves glitter or multiple layers of polish, you may find it difficult to remove all the polish using just a remover. In this case, a gentle nail buffer can help smooth the surface and remove any leftover polish.
- How to Do It: After using your remover, take a soft nail buffer and gently buff the surface of your nails to remove any residual nail art. Be careful not to over-buff, as this can cause the nails to become thin and weak.
5. Hydrate Your Nails After Removal
Once your fall nail designs are completely removed, it’s important to give your nails the hydration they need. The removal process, especially when using acetone-based removers, can leave your nails dry and brittle. After removal, apply a nourishing cuticle oil and hand cream to restore moisture and keep your nails healthy.
- How to Do It: Gently massage a moisturizing cuticle oil or nail serum into your nails and cuticles. Follow up with a rich hand cream or lotion to keep your hands and nails hydrated throughout the day.
Best Tools for Remove Fall Nail Designs
Using the right tools can make the nail removal process smoother and safer. Here are some of the best tools you can use to remove your fall nail designs:
1. Cotton Pads or Balls
Cotton pads or balls are essential for soaking and applying nail polish remover. They’re gentle on your nails and provide good coverage for removing polish effectively.
2. Aluminum Foil
Aluminum foil helps to wrap your nails when soaking them with remover. It keeps the cotton pad in place, ensuring that the remover soaks into your nails and softens the polish.
3. Wooden Cuticle Pusher
A wooden cuticle pusher is great for gently pushing off any remaining nail art or polish without causing damage to the nail. It’s less abrasive than metal tools, making it safer for your nails.
4. Nail Buffers
A soft nail buffer is helpful for removing excess polish or smoothing out the nail surface after polish removal. Choose a fine-grit buffer to avoid causing damage to the nail.
5. Nail Clippers
If your nails have grown long and you want to shorten them before remove fall nail designs, nail clippers are a quick and easy tool to use. Always clip nails straight across to prevent breakage.
How to Protect Your Nails After Removal
After removing your fall nail designs, it’s important to protect and nurture your nails to ensure they stay healthy. Here are some tips for keeping your nails in top shape after removal:
1. Give Your Nails a Break
After removing nail art, give your nails a few days to breathe before applying any new polish. This helps prevent weakening your nails from constant exposure to nail products.
2. Strengthen Your Nails
If your nails feel weak or thin after removal, use a strengthening nail treatment to restore their health. Look for treatments that contain biotin, keratin, or calcium to help fortify your nails.
3. Regularly Moisturize
Hydrating your nails and cuticles is key to keeping them healthy. Make sure to apply cuticle oil and hand cream daily, especially after removing nail polish. This will help restore moisture and prevent cracking or peeling.
Conclusion
Remove fall nail designs doesn’t have to be a stressful process that leaves your nails damaged. By using the right tools, gentle techniques, and hydrating products, you can safely remove your nail art and maintain healthy nails throughout the season. Whether you’re dealing with glitter, gel polish, or intricate designs, taking the time to properly care for your nails during the removal process will ensure that your nails stay strong, moisturized, and ready for your next stunning manicure.